

This article may contain affiliate / compensated links. For full information, please see our disclaimer here.
If you’re looking for ways to create more than just a barebone, basic opt-in form, here’s a complete OptinMonster review to show you all that this incredible tool can do.
Let’s be real: pop-ups can be annoying. But if you can create them so that they look irresistible, set them so they appear at optimal times, and track conversions so you know what works, pop-ups start to become less annoying and more useful.
So useful in fact, that pop-ups can be the main driving force behind a successful email marketing strategy.
To date, we have more than 100,000 email subscribers on our list and attribute much of our email marketing success to the pop-ups we’ve been able to create with OptinMonster.
Email marketing is central to our business strategy and is the main way we connect with our audience. OptinMonster has allowed us to level up our email marketing game, create professional and engaging pop-ups for our blog, and capture more email addresses than ever.
If you’re curious about all that OptinMonster can do for your blogging business, check out this full review complete with a tutorial on how to use it and why we love this tool so much!
What is OptinMonster?
OptinMonster is the program we use to create pop-ups for our blog. Pop-ups are one of our main strategies for collecting emails for our list, which is essential to our trust marketing strategy and passive income.
While many email marketing services give users the ability to create plugins on their platform, we’ve found they’re quite limited in customization options. That’s why we’ve turned to OptinMonster!
OptinMonster not only allows you to create pop-ups, but gives you the option to create so many different kinds of pop-ups.
Beyond just options for what the pop-up looks like, OptinMonster allows you to control things like where the pop-up appears on your blog, the timing of the pop-up, and plenty of other factors that increase conversions.
With OptinMonster, users can set up different triggers to get their pop-ups to appear at optimal times.
One of the most sought after triggers is “exit intent” (trademarked by OptinMonster) which is the ability to show your pop-up when someone is leaving your page. This is not something that’s offered widely in pop-up tools, which is just one reason why OptinMonster stands out and is well-loved among email marketers.
To make pop-ups fall in line with your brand and style of your blog, OptinMonster has countless customization options and heaps of different elements to choose from so that you can round out the look of your pop-up.
OptinMonster comes complete with advanced stats and metrics showing how your pop-ups perform on your blog, as well as the ability to A/B test different versions of your opt-in.
People (including us) love OptinMonster because of how detailed the reporting is on the effectiveness of the pop-ups are in terms of conversions. These kinds of metrics are quite limited on other platforms, which is another reason why OptinMonster reigns supreme.
Best of all, OptinMonster was created to be compatible with dozens of email marketing platforms as well as WordPress, making it another must-have resource in any blogger’s toolbox.
At a glance, OptinMonster allows you to:
- Make different types of pop-ups and email forms for readers to subscribe to your email list
- Set triggers for pop-ups based on timing, reader behavior, and more
- Check out advanced analytics and metrics based on how your pop-up performs
- Connect forms to email marketing platforms and WordPress
In the rest of this OptinMonster review, I give a complete overview of the elements available, as well as a tutorial on how to create popups of your own using this tool. I also touch on OptinMonster pricing as well as why we love it so much personally.
Are you ready? Let’s get started.
How to Use OptinMonster (Tutorial)
One of the best things about OptinMonster is how easy it is to use. The program guides you through the process of creating a captivating pop-up and getting it set up on your website.
Here’s a complete OptinMonster tutorial so that you can create pop-ups of your own.
Step 1: Create a Campaign
When you first sign into OptinMonster, you’ll land either on the main Dashboard or the Campaigns page. From either one of these pages, click the green button that says “Create New Campaign” in the upper right-hand corner.
From there, select your campaign type.
OptinMonster offers lots of different campaign types besides pop-ups so that you can create email forms that fit your unique needs. You can have your opt-in fall in line with text or appear as a floating bar.
You can also create gamified pop-ups using OptinMonster with animated features, and pop-ups that take up the entire screen. The possibilities are endless!

Once you decide on a campaign type, browse through the templates to find something that works for your needs.
A huge reason so many bloggers love OptinMonster is how many templates they have available to use. Instead of having to create a pop-up from scratch, OptinMonster gives you access to 65+ templates to work from, in a huge range of categories.
The templates are even split up into “Goals” where you can choose from options like “Grow Email List”, “Target Abandoning Visitors”, “Time Sensitive Offer”, and more.
This allows you to choose a template that converts for specific actions or goals that you may have for your pop-up. For example, templates in the “Target Abandoning Visitors” category are all optimized to capture a reader’s email before they leave the page.

When you decide on a campaign type and settle on a template, hover over the template and click “Use Template” to move on to the next step, or “Preview” if you want to see what it looks like.
When you click “Use Template”, you’ll be prompted with a form where you can fill in a name for your campaign and choose which website or blog you’d like it to appear on.
After that, click “Start Building” and you’ll get to make the pop-up your own.
Step 2: Customizing Your Pop-up
One of the best parts about OptinMonster is how easy it is to get your pop-up looking professional.
After you choose a template, you’ll be brought to the editor where you’ll be able to customize your pop-up to make it look exactly the way you were imagining.

To customize your pop-up, simply hover over your template and different blocks will appear (similar to the Gutenberg editor on WordPress). Just click the block you’d like to customize and a side panel will open on the left showing you all the different ways you can change up the design of that particular feature.
It’s really intuitive to edit things like the text, fonts, colors, call-to-actions, forms and fields, as well as your logo and the X button that allows readers to close the pop-up. You can add images, backgrounds, and a whole range of styles to your pop-up so that it fits the look and feel of your website perfectly.

This is the same template as above, just revamped using the editing tools in 5 minutes. The controls are so simple that it’s a total breeze to create professional-looking pop-ups with a range of features.
In the editor, you’ll also have the chance to decide what appears after your opt-in.
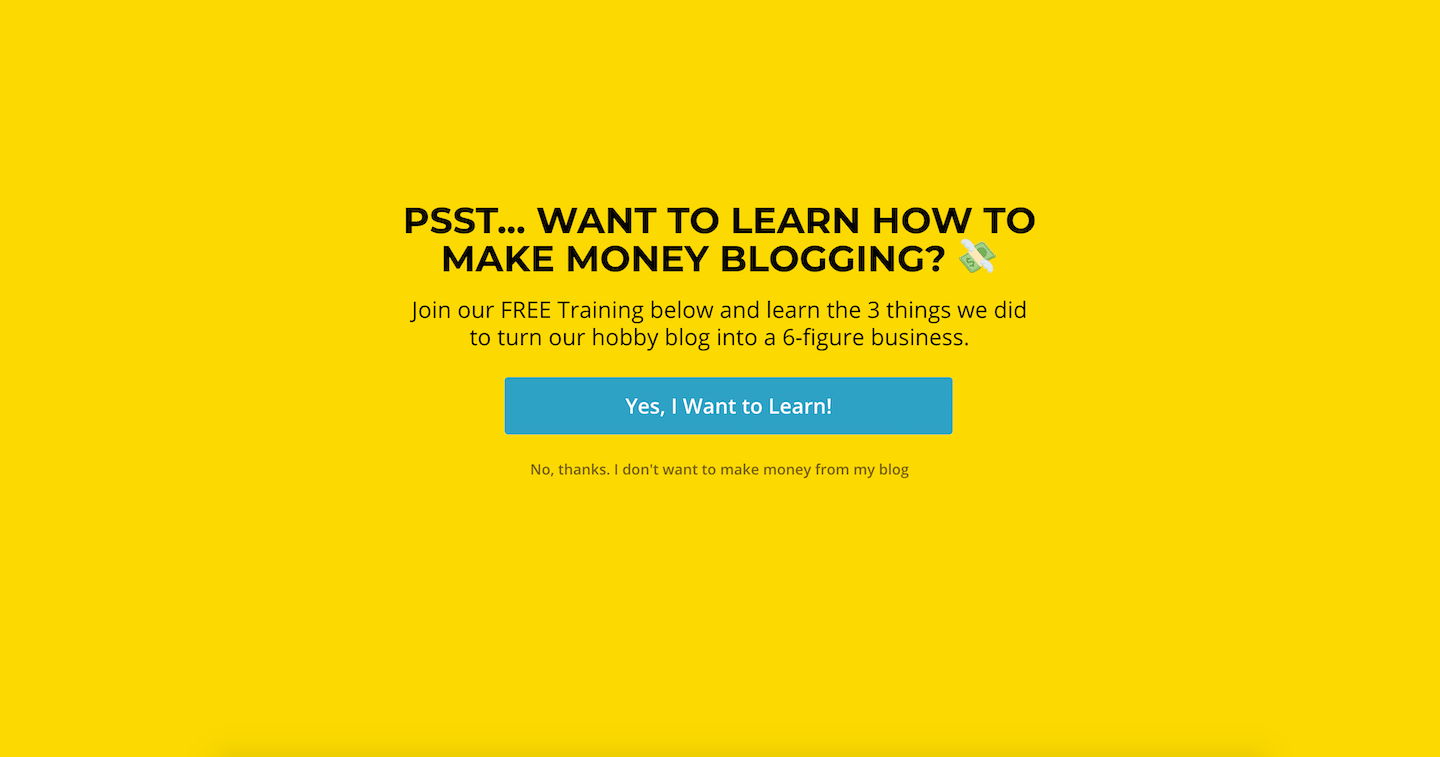
While the template may show the standard fill-in email field, you can change your pop to be a “Yes/No” campaign and choose what it displays when a user clicks either of these fields. OptinMonster also gives you the option to import a layout of your own or add more blocks to an existing template to extend the features of your pop-up.
This is one way we’ve used the “Yes/No” option for a campaign:

On the top bar of the editor, you’ll also find a “Success” option which is where you can create a follow-up pop-up that appears when someone successfully enters their email.
Here’s what “Success” forms look like in action.
First the initial pop-up appears:

Then after the forms are filled out, the “Success” screen displays:

This can be set up by clicking the “Success” tab on the top bar of the editor and creating your own success form the same way you built your pop-up. You can toggle back and forth between your main pop-up and your success form by clicking the “Opt-in” option on the top bar.
Pro Tip: One thing you’ll want to do with all of your pop-ups is to make sure to configure the “Cookie Duration” in the Display Settings tab. Doing this will allow you to decide how long the pop-up will be hidden if someone closes or submits it. That way people don’t get bombarded with your pop-up over and over, if they’ve already taken an action with it.
After tinkering with all of these elements, you’ll be able to set rules surrounding your pop-up.
Step 3: Set the Rules
Once your pop-up looks exactly the way you want it to, click “Display Rules” next to the Design tab on the top bar.
In this panel, you’ll be able to determine when exactly your pop-up appears and if there are any special parameters around it.
You’ll be able to choose different display rules and triggers such as:
- Time on Page
- Exit Intent (a feature trademarked by OptinMonster)
- New Visitor
- Returning Visitor
- Scroll Distance
- Number of Pages Viewed
- … and more!
Then, you’ll be able to set even more specificities surrounding the option you’ve chosen.

For example, many of our pop-ups are triggered by “Time on Page”, so we set the display rule to show our pop-up to readers after they’ve spent 30 seconds on a page.
We also really like the Exit Intent trigger and use this to display lots of pop-ups as well. As soon as someone motions to leave the page, our pop-up appears with an opt-in form before they go.
OptinMonster’s display rules are particularly powerful as they enable you to target specific reader’s actions in order to convert more effectively.
After you’ve chosen your display rules, click “Next Step” and you’ll set the “Actions”. This is when you calibrate your pop-up so that when the display rule is triggered, your opt-in appears.

Click “Next Step” and you’ll be brought to a summary of your display rules and an overview of when the pop-up will show up on your blog.
Step 4: Set Up Integrations
Now that you have your display rules set up, it’s almost time to get your pop-up live… you just have to make sure that it can actually collect email addresses.
You can do this with the “Integrations” tab on the top bar, which is the next option after “Display Rules”.
On the sidebar of the “Integrations” page, click “+ Add New Integration”. From there, choose the email provider/email marketing service you use, and choose the email provider account.
Then click “Connect” and this will link your pop-up up to your email marketing service so that when people fill in their emails, they’ll actually populate and turn into subscribers.
Step 5: Publish Your Pop-up
Finally, it’s time to publish your pop-up so that it can start collecting email addresses.
To do this, you’ll want to set the status from “Paused” to “Live” and select which website you’d like it to appear on.
Just below this, you’ll have the option to preview your opt-in, so make sure you check it out to see that everything’s looking right.
Then, you just have to decide how to integrate it onto your website.
OptinMonster allows you to do this in a variety of ways, whether you’d like an account-wide embed code or a shareable link. You can also integrate OptinMonster to WordPress so that you can launch your campaigns directly from your blog (there’s a section on this next), or use a campaign embed code to physically place on your pages or in your content.

After you decide how you want to publish it, simply insert the code on the page where you’d like it embedded and voila! You have a pop-up.
How to Integrate OptinMonster with WordPress
A top reason why bloggers love OptinMonster so much is that it’s actually a WordPress plugin. This makes integration painless once you’ve designed your opt-in.
To integrate OptinMonster to WordPress, click “Plugins” on your WordPress dashboard and search for “OptinMonster”. Then click “Install Now”.
Once the plugin installs, click “Activate” and you’ll be able to connect your existing OptinMonster account. Doing this will give you access to all of the campaigns you’ve already created.
After you put in your details, click “Authorize OptinMonster” and if your account looks correct, click “Connect to WordPress”.
Once everything has been verified, OptinMonster will show up in the sidebar of your WordPress account and you’ll be able to see and control all of your campaigns that have been configured.
Note: When you sync your campaigns from the website to WordPress, they’ll automatically be set to live, so be sure to go into OptinMonster and configure the display rules before linking them up to WordPress.

OptinMonster Review: Why We Love It
Email marketing is a huge part of our business strategy when it comes to blogging, and a large portion of that can be attributed to our pop-ups and email form integration on our blog.
OptinMonster has changed the game in terms of the way pop-ups appear on blogs, the look and feel of the opt-in forms, and the metrics that come along with it.
We love OptinMonster and have found that it’s integral to our success as bloggers, as it allows us to create good popups that actually convert.
If you’re planning on using pop-ups on your blog, there’s no better choice than OptinMonster. Here are some reasons why we love it.
Easy to Use
First off, OptinMonster is so easy to use, even if you’re not tech-savvy!
I know it can be intimidating to think about setting up things like display rules and triggers, but OptinMonster walks you through each element step by step so that you can get things just right on your blog.
Besides being ultra user-friendly, OptinMonster has made it so easy to complete simple processes like editing your existing pop-ups.
For example, when we wanted to add an image to one of our opt-in forms, all I had to do was go in and add the image in OptinMonster. Once I saved it, this image showed up in the existing pop-ups on my blog instead of me having to insert it manually, one by one.
The templates are incredibly helpful, the editor is a breeze to use, and it’s so simple to get your pop-ups live. Instead of spending days trying to set something up, OptinMonster allows you to create captivating callout boxes and email forms quickly and efficiently.
Lots of Form Options + Templates
One of the things we love most about OptinMonster is how many options are available. You can create anything with this bad boy, not just your standard, run-of-the-mill pop-ups.
OptinMonster allows you to create inline email forms, pop-ups that take up the entire screen, floating bars, thank you screens, and so much more. You can add social media buttons or success screens, custom images, fonts, elements and beyond!

Here’s a pop-up we made to target readers interested in Thailand.
Not only do we have the email form directly on the pop-up, but we included an image of the download that readers get when they sign up.
This is just one way that OptinMonster allows users to create ultra enticing pop-ups. When readers can see what they’ll get in exchange for their email address, they’re much more likely to hand it over!
Beyond that, with OptinMonster, we’re able to show our pop-ups on specific pages, which means that we can target readers based on their interests.
If we show a pop-up offering a free Thailand bucket list on an article about Thailand, it’s more likely the readers will be interested in leaving their emails than they would if this pop-up appeared on our homepage.
Pop-ups like this are central to our email marketing strategy as they allow us to showcase and send off our value gifts, which readers get in exchange for their email address. This has been really useful in building segmented email lists and campaigns as we can target specific readers surrounding their interests through our opt-in forms.
Here’s another example of a form we use from OptinMonster which we embed inline in some of our articles.

We created this inline opt-in so that people could subscribe to our email list while reading through content. Since this form actually sits within an article, it isn’t as disruptive as a pop-up while still having the desired effect.
You’ll never be stumped when it comes to creating an opt-in because of the sheer number of templates available. OptinMonster has something for everyone, and templates based on any kind of pop-up you could ever want to create.
And if they don’t have it? Create it from scratch!
As you can see in this OptinMonster review, OptinMonster really pulled out all the stops to make their platform usable for anyone, no matter what type of website or blog they have, and this is something we really appreciate!
No matter what your unique needs are, OptinMonster has a form or template for you.
Integrates Well With WordPress
Another awesome aspect of OptinMonster is how well it integrates with WordPress.
The fact that it’s actually a WordPress plugin makes it so simple and easy to get your pop-ups exactly where you want them when the time is right. Convenience is everything, people.
From WordPress, you can easily toggle between campaigns, set them to “Live” or disable them, edit the design or switch the output settings… All without leaving WordPress! Talk about easy.
Besides just being a plugin, we actually use OptinMonster shortcodes to insert into our articles on WordPress. Doing this is extremely simple and enables us to have email forms directly in our content.
The WordPress integration is a component of OptinMonster that simply cannot be overlooked, if you’re a blogger!
You can learn about our tried and tested strategies for turning a blog into a business by signing up for our free online training below.

Great Analytics
If you’re serious about email marketing (or hope to be someday), analytics are everything. You need to know how your pop-ups and forms are performing to know whether they need to be tweaked to increase conversions.
The type of data OptinMonster provides is invaluable when it comes to growing your email list.
Besides just showing what works or not, OptinMonster has complete metrics detailing:
- Visitors
- Conversions
- Top converting campaigns
- Top converting pages
- And more!
When you know which campaigns and pages convert the best, you can alter your email marketing strategy to work off this.
While email marketing tools may allow you to see metrics about subscribers, they seldom offer pop-up specific feedback, which makes it challenging to know what converts or not.
This is yet another reason why OptinMonster is essential to round out any email marketing strategy.
Here are metrics for one of our campaigns:
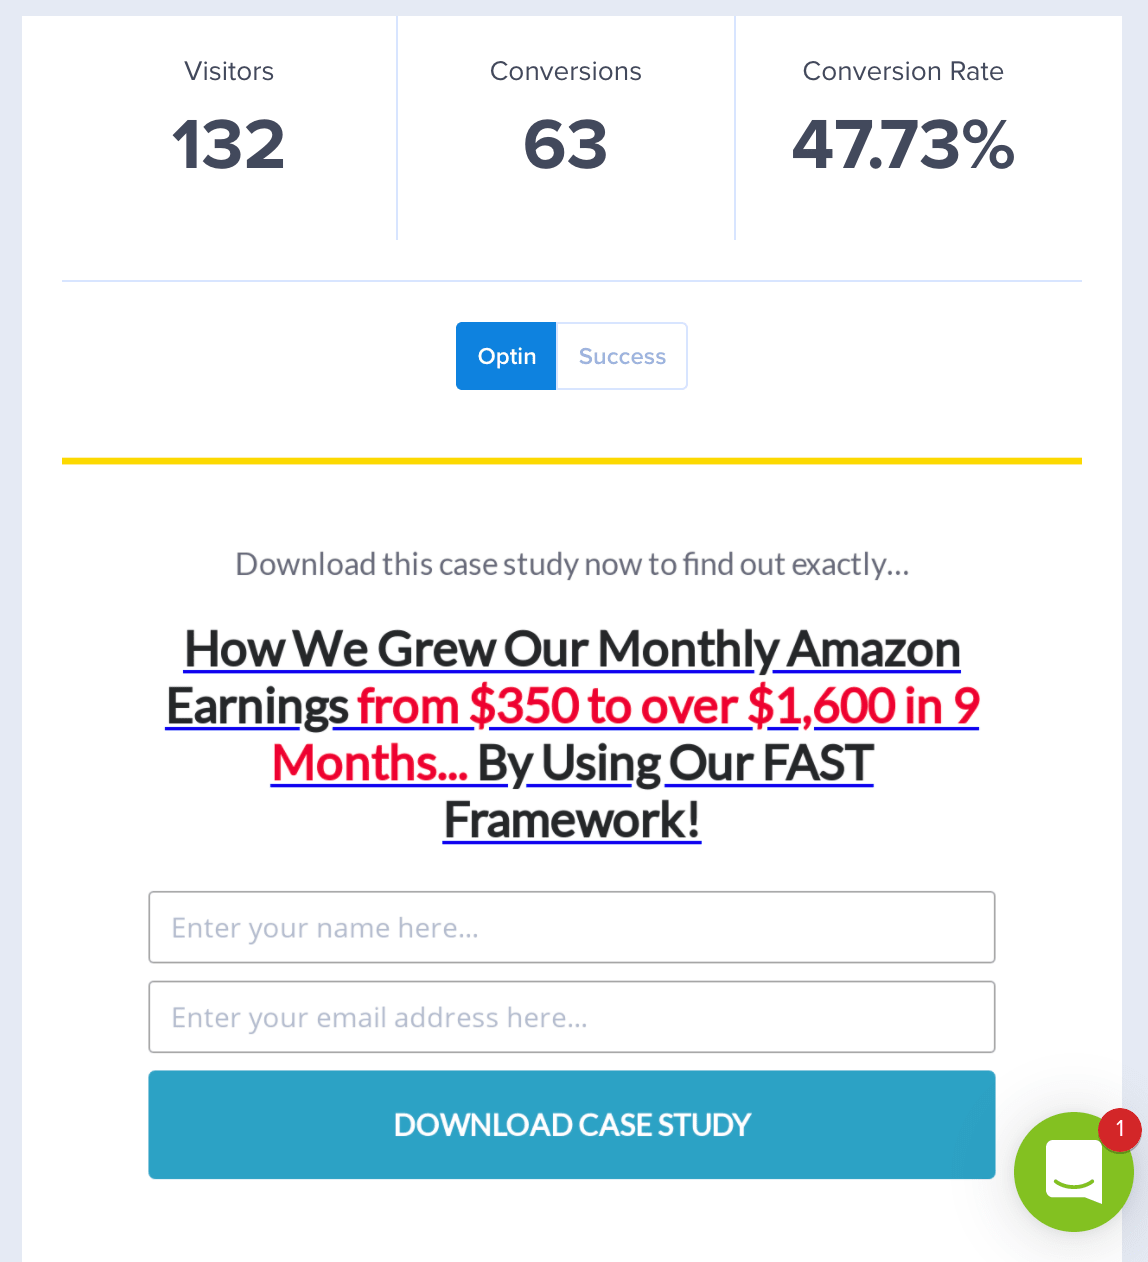
Just at a glance, we can see how many people have seen the opt-in, how many conversions it’s completed, and the overall conversion rate. From here, we can tell that this opt-in works pretty well, so it’s worth keeping it on a page to continue collecting emails.
Beyond the metrics, OptinMonster also allows users to do things like run A/B campaigns to test out different copy, images, or timing. Doing this makes a world of difference as you’re not just fumbling around in the dark to find something that works… you’re actually being strategic with it and able to make a solid change based on your findings!
OptinMonster Pricing
While there’s no free version of this tool, OptinMonster pricing is really reasonable when you realize how much it can do.
For us, although most email marketing tools come with basic pop-up capabilities, the design options, usability, and ability to A/B test more than makes up for the price.
Basic plans start at $9 per month when billed annually or $19 with monthly billing. With the Basic plan, you get unlimited campaigns across all campaign types, list segmentation, simple reporting, basic integrations, and pop-ups for a single website.
If you are running more than one blog or are looking for some more advanced features like integrated A/B testing, full reporting, and increased page views, you’d benefit most from the Plus plan, which is $19 per month, billed annually.

There are other plans for more professional use, but as a beginner or intermediate blogger, you’ll probably be just fine with the Basic or Plus plans in terms of OptinMonster pricing.
OptinMonster Review: Our Verdict
As for our final verdict? OptinMonster is without a doubt the best lead generator and pop-up creator out there. It has greatly contributed to our success with email marketing due to increased conversions and flexibility as to what you can do with your opt-ins.
The robust reporting has allowed us to tweak our campaigns so we can get them just right, and the WordPress integration has made it simple to always toggle between campaigns that we are running.
OptinMonster has done tremendously when it comes to simplifying the process of getting pop-ups onto a blog, and has made them exceptionally compelling at the same time.
The immense number of template and customization options is enough to hook anyone with an eye for design, and the metrics are the cherry on top for people looking for increased pop-up analytics.
If you’re hoping to create beautiful pop-ups that actually convert, there’s no better tool than OptinMonster.
Click the button below and try it out for yourself today!
Like this Article? Pin it!